StudioOS guide
Members
Register a new student in under a minute, find anyone with one-click filters, and manage each member's profile, packs, payments and portal access.
Members is the master list of everyone who has come to your studio — regulars, people whose pack has run out, and leads who haven’t booked yet. Open it from the sidebar.
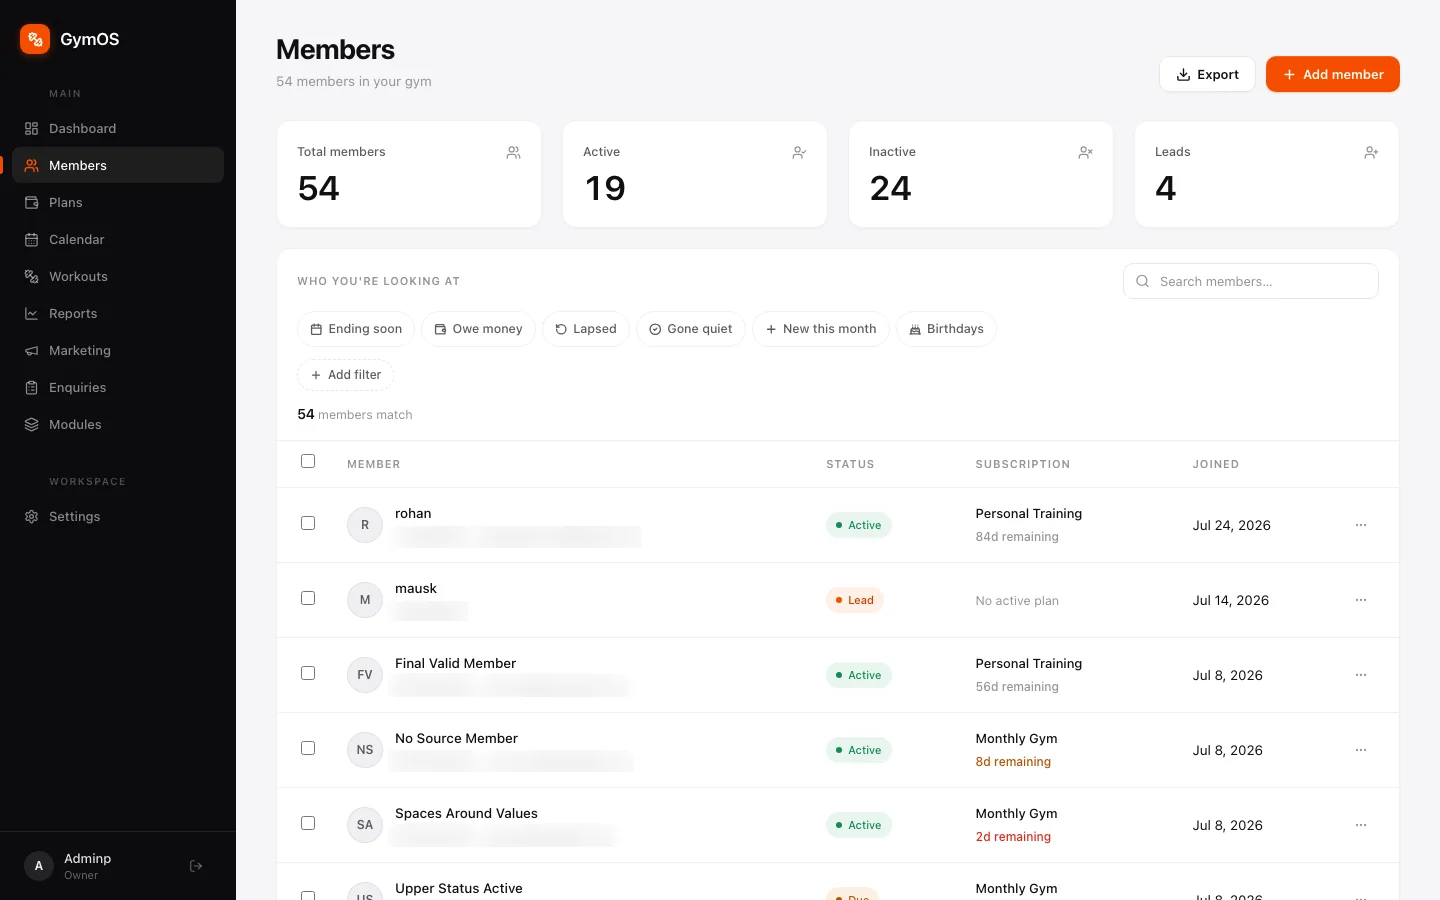
Finding a member
Four counters run across the top: Total members, Active, Inactive and Leads.
Under Who you’re looking at, one-click filters pull out the lists you need every day:
| Filter | Shows members who… |
|---|---|
| Ending soon | have a plan running out within 14 days |
| Owe money | have at least one payment past its due date |
| Lapsed | ended in the last 90 days and never came back |
| Gone quiet | used to come in but haven’t been seen for 30 days |
| New this month | joined in the last 30 days |
| Birthdays | have a birthday this month |
+ Add filter narrows the list further.
The search box on the right matches a name, phone number or email. Export downloads the list you’re looking at.
Each row shows the member’s status (Active, Lead, Due or Inactive), their current plan or pack with the days remaining, and when they joined. Click a row to open the profile, or use the ⋯ menu for quick actions.
Registering a new member
-
Click + Add member in the top-right corner.
-
Fill in the form. Only Full name and Phone are required.
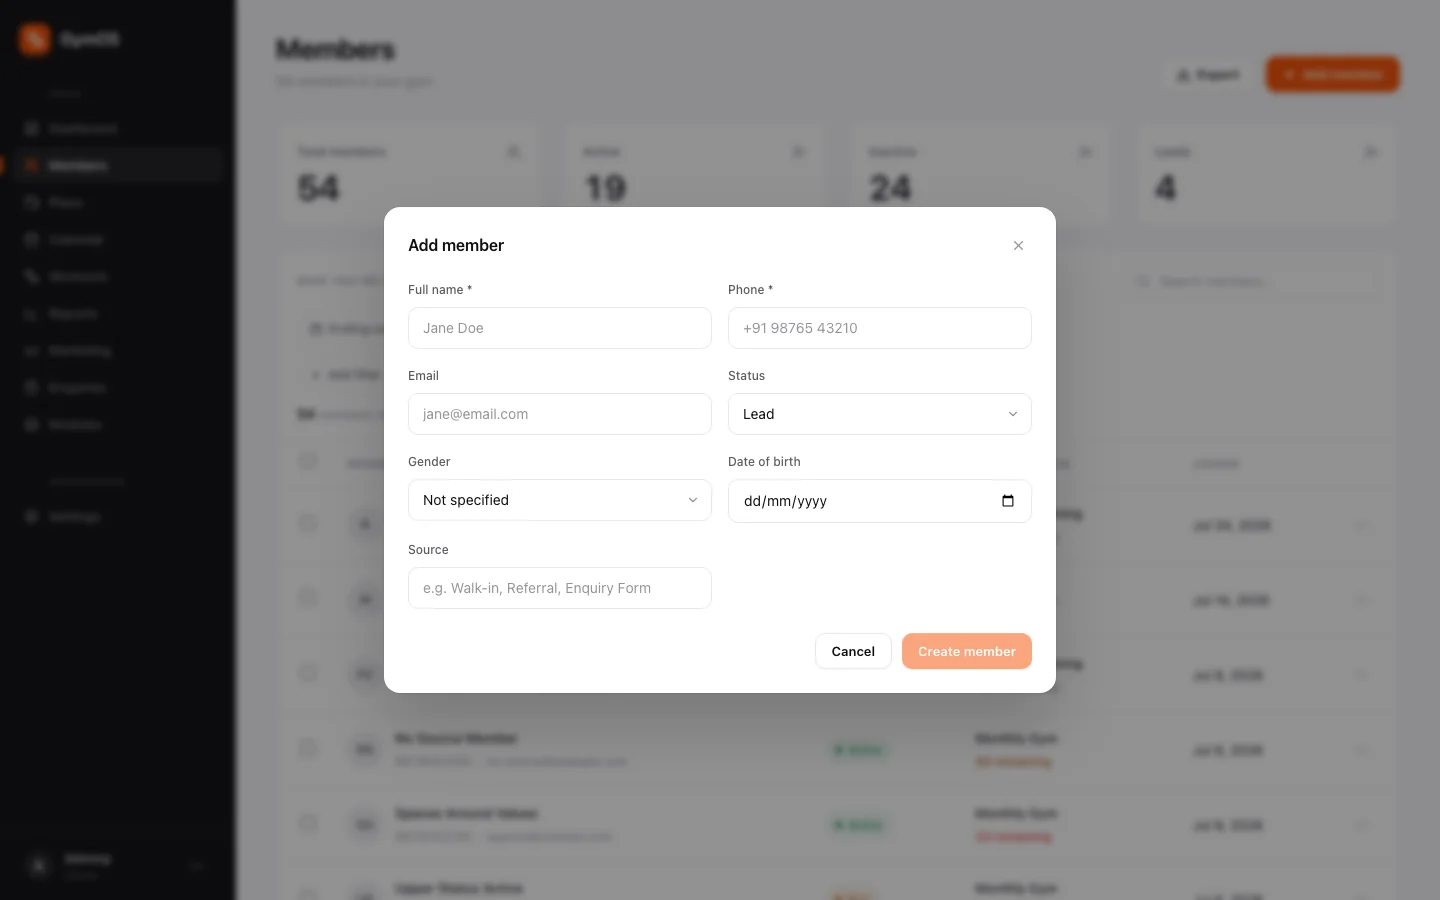
The Add member form Field Notes Full name Required. Phone Required. It’s also the member’s first password for the member portal. Email Optional, but needed for email reminders. Status Active, Inactive or Lead. Pick Lead for someone who came to a trial but hasn’t bought a pack. Gender Optional. Date of birth Optional. Powers the Birthdays filter and the birthday reminder. Source Where they came from — Instagram, Referral, Trial class. It’s how you’ll later see what actually fills your classes. Any custom fields you’ve added to the Members form appear here as well.
-
Click Create member.
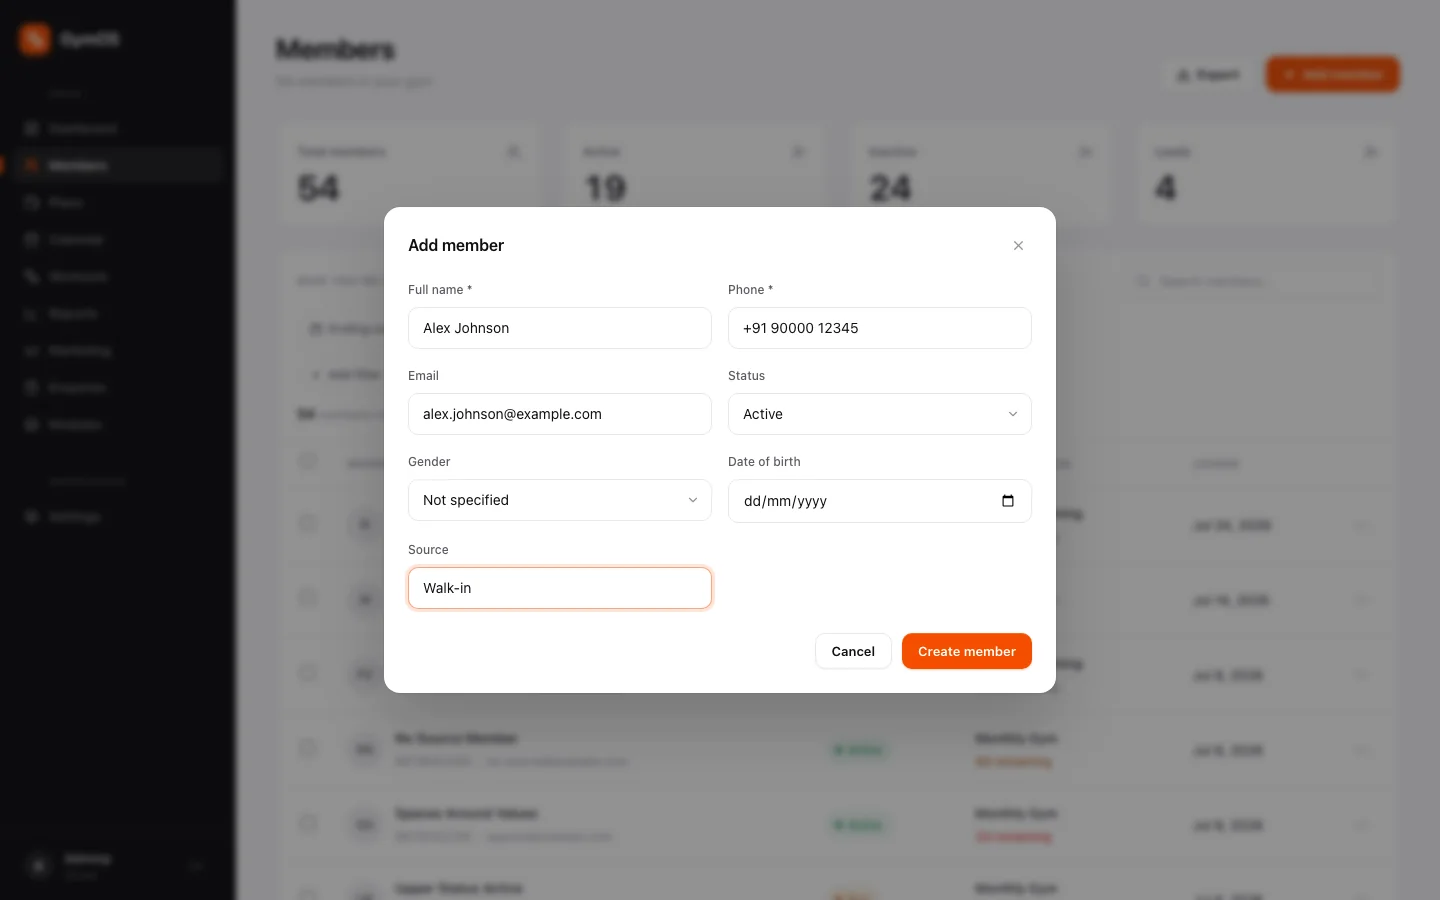
A completed Add member form
The member exists straight away. To sell them a class pack and book their first classes, see Subscriptions and payments.
The member profile
Click any row to open that member’s profile.
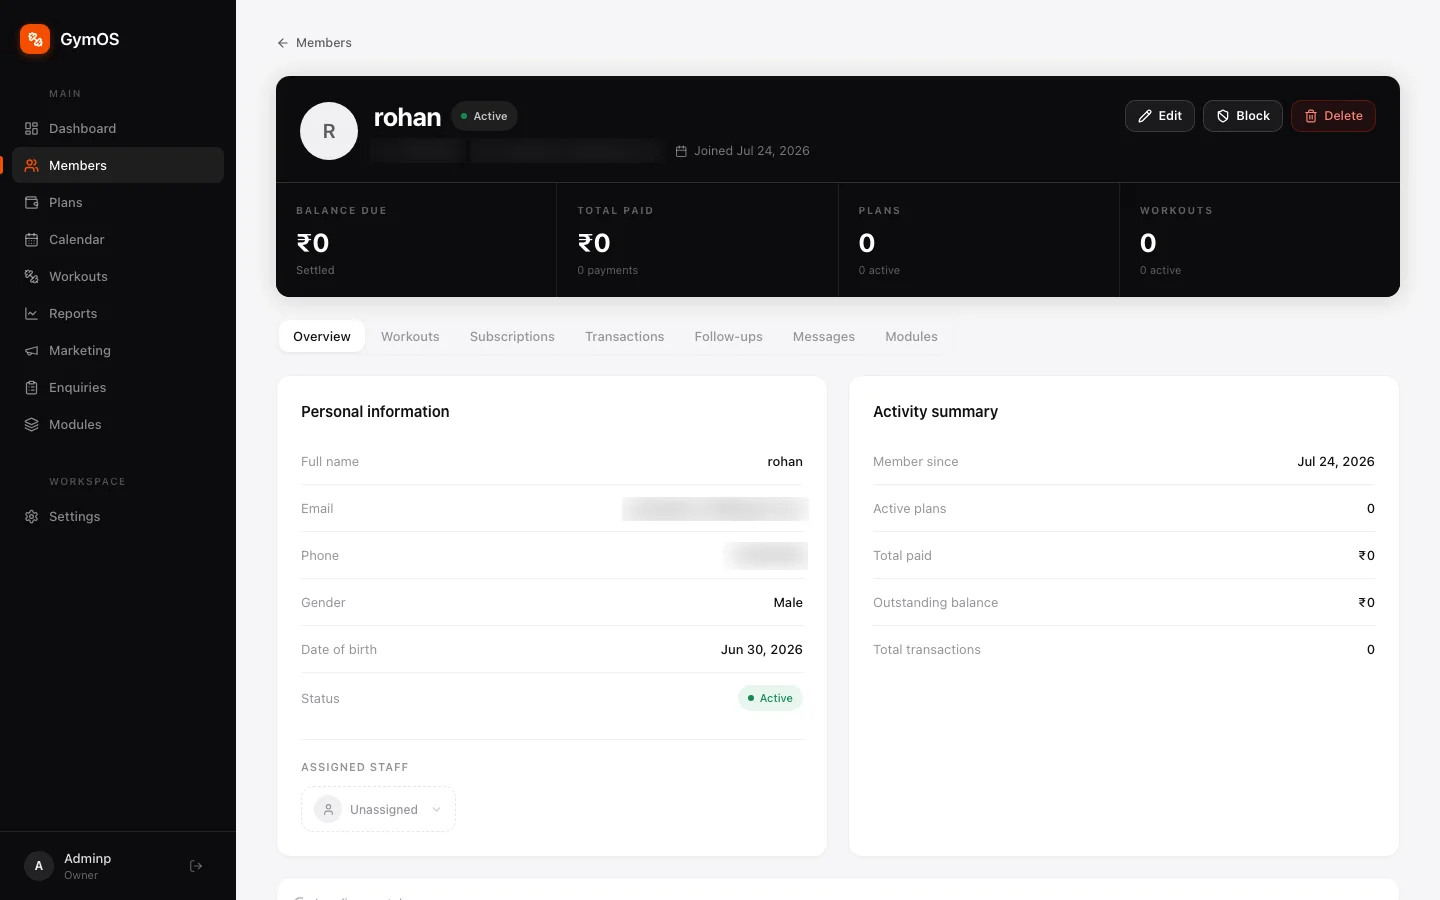
The strip across the top stays visible on every tab and shows figures such as Balance due, Total paid and active Plans, with Edit, Block and Delete beside them.
| Tab | What’s on it |
|---|---|
| Overview | Personal details, the assigned staff member, an activity summary and portal access. |
| Subscriptions | Every plan and pack they’ve bought, past and present. |
| Transactions | Every payment recorded against them. |
| Follow-ups | Notes and reminders your team has logged for them. |
| Messages | The WhatsApp and email messages they’ve been sent. |
| Modules | Records from your custom modules linked to them — workshop sign-ups, costume sizes and so on. |
If the member has an upcoming or overdue payment, it shows on the Overview tab with a View & pay button.
Member portal access
The Overview tab has a switch for self-service access. Turn it on and the member can sign in to their own member portal to see their plan and payments.
Editing, blocking and deleting
- Edit opens the same form as Add member, filled in with their current details.
- Block stops a member from using your services — for unpaid dues, say. You can add a reason, and unblock them later.
- Delete removes the member. It can’t be undone, so you’re asked to confirm first.
Stuck on a step, or found something that doesn't match your screen? Email support@svich.in.